No Comments Yet
Be the first to share your thoughts and start the conversation.

By logging in, you'll unlock full access to this and other free tutorials on JSM Pro.
Why? Logging in lets us personalize your learning experience, track your progress, and keep you in the loop with new workshops, coding tips, and platform updates.
You'll also be the first to know about upcoming launches, events, and exclusive discounts.
No spam—just helpful content to level up your skills.
If that sounds fair, go ahead and log in to continue →
Enter your name and email to get instant access
Be the first to share your thoughts and start the conversation.
Appwrite updated their naming scheme recently, and the setup is a bit different now. Make sure to check out the detailed instructions below.
Create account on Appwrite or if you already have one then login with it.
Link: https://cloud.appwrite.io/console/login
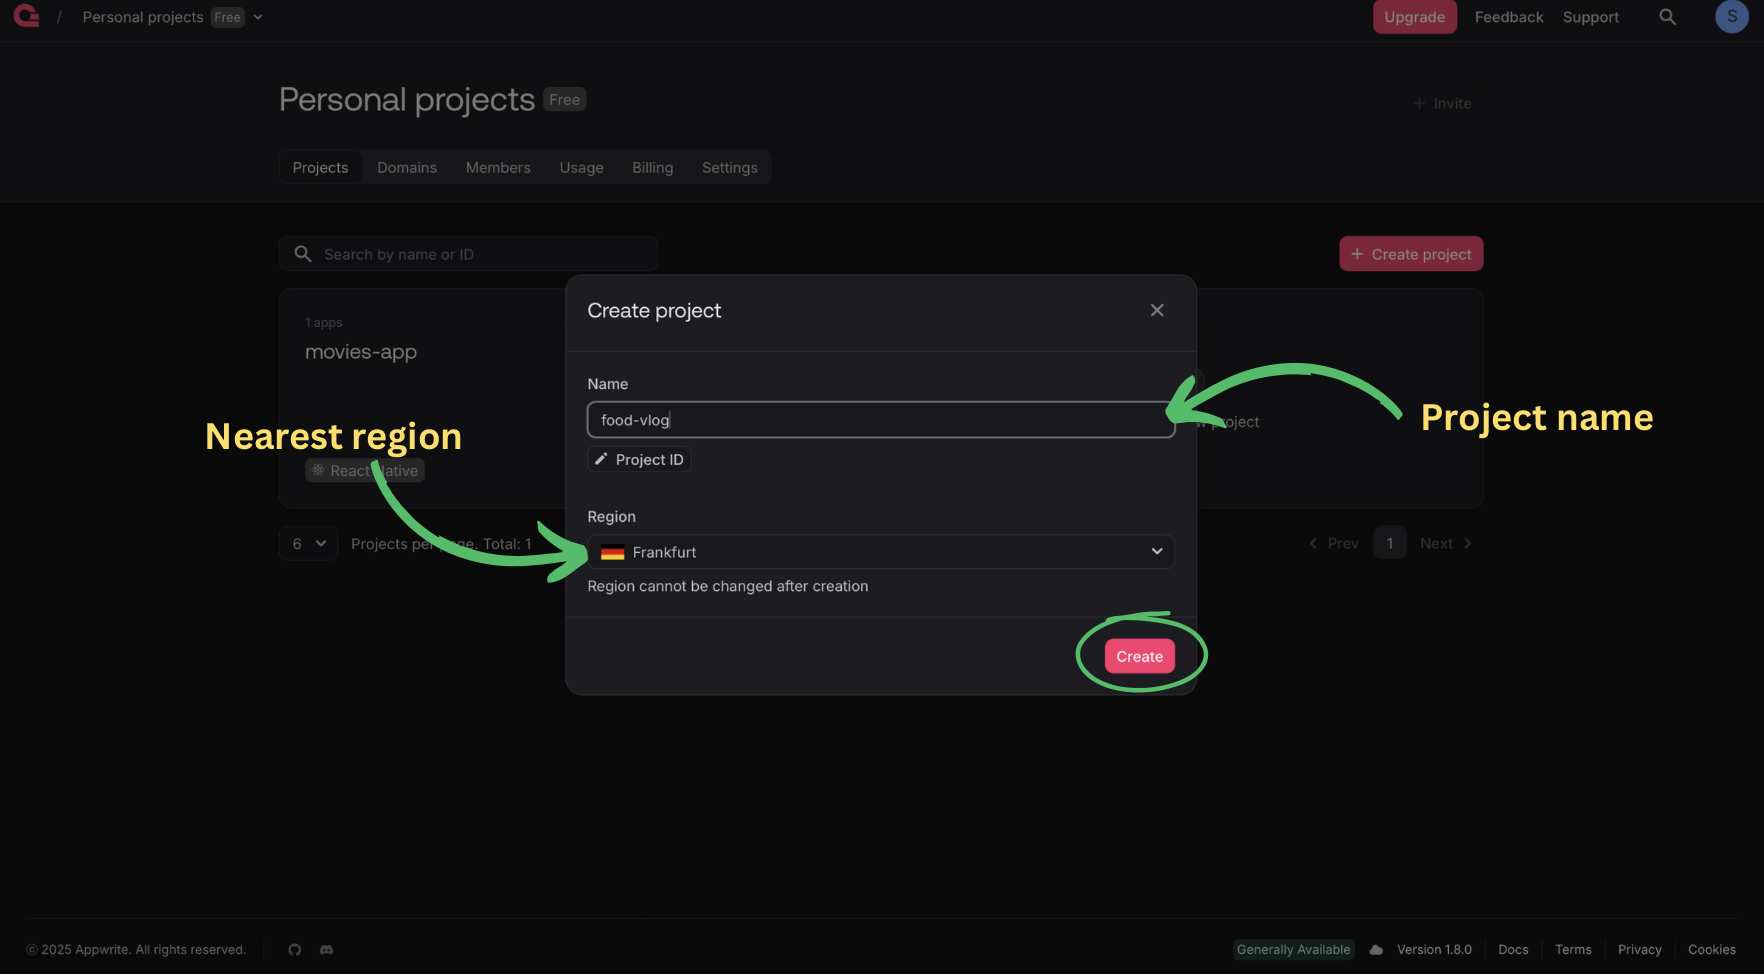
Using the “Create project” button you can create new project.

Enter project name, choose the nearest region and click on “Create” to create new project.
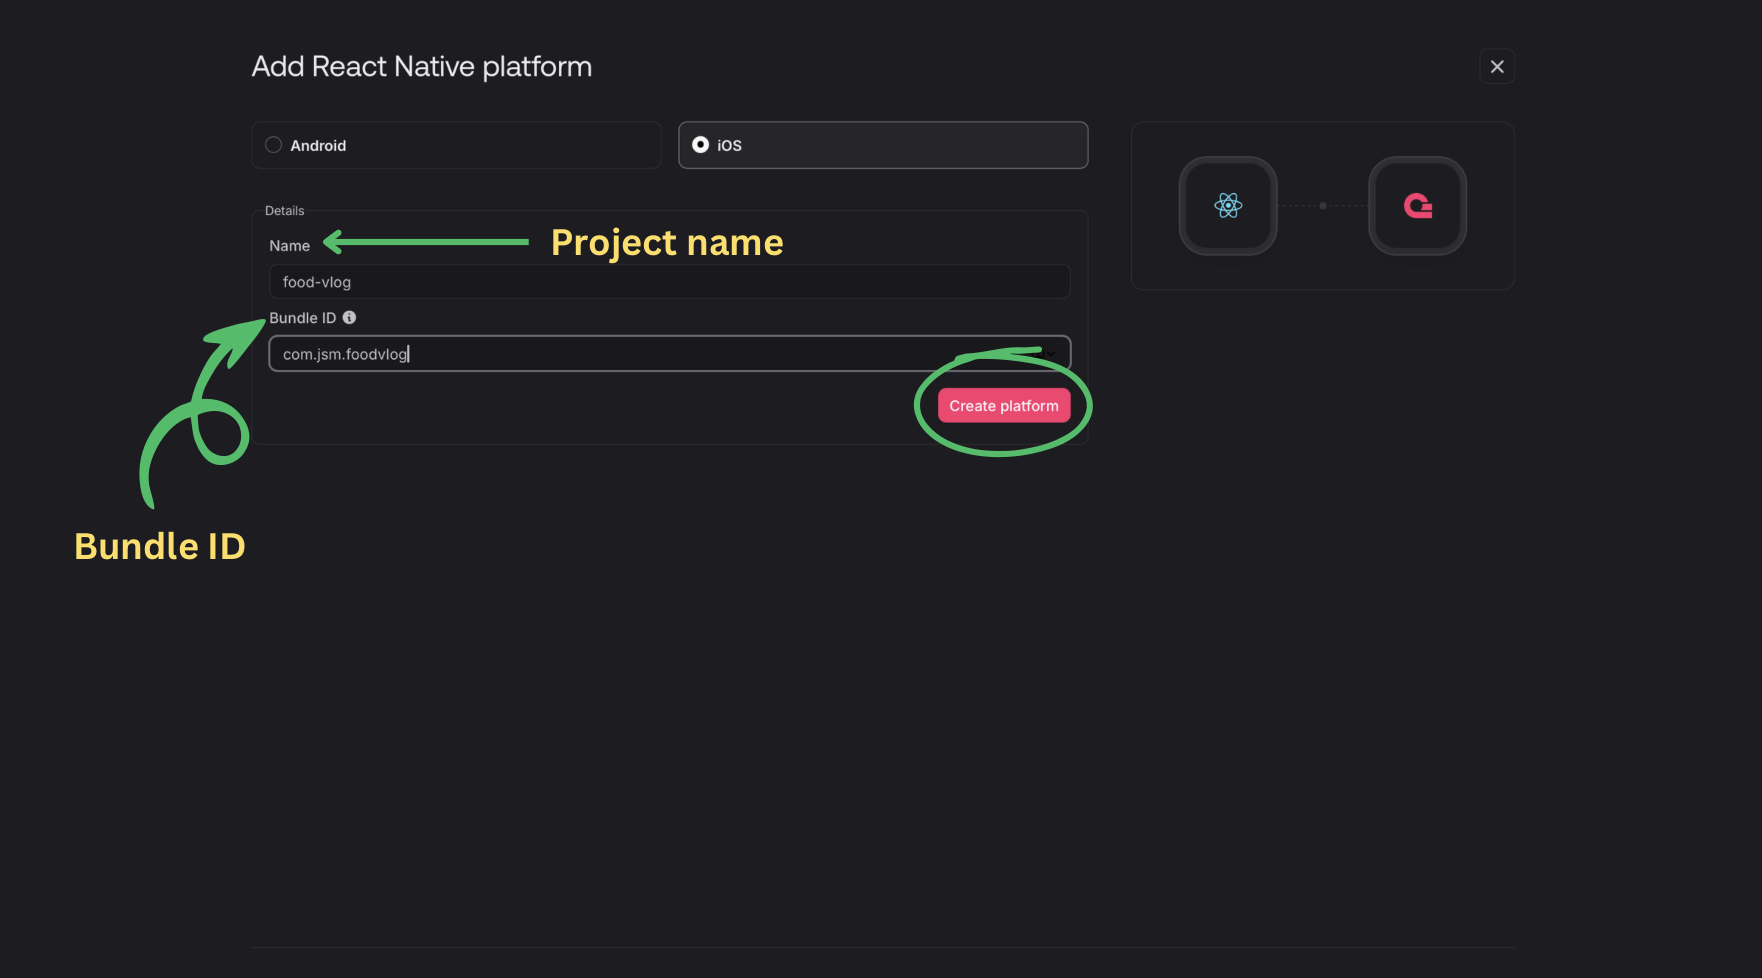
Select the platform for your project in our case it is “React Native”

Select the operating system of you device “Android/ ios” , enter name of the project and bundle ID (eg: com.jsm.foodvlog). Click on “Create platform”
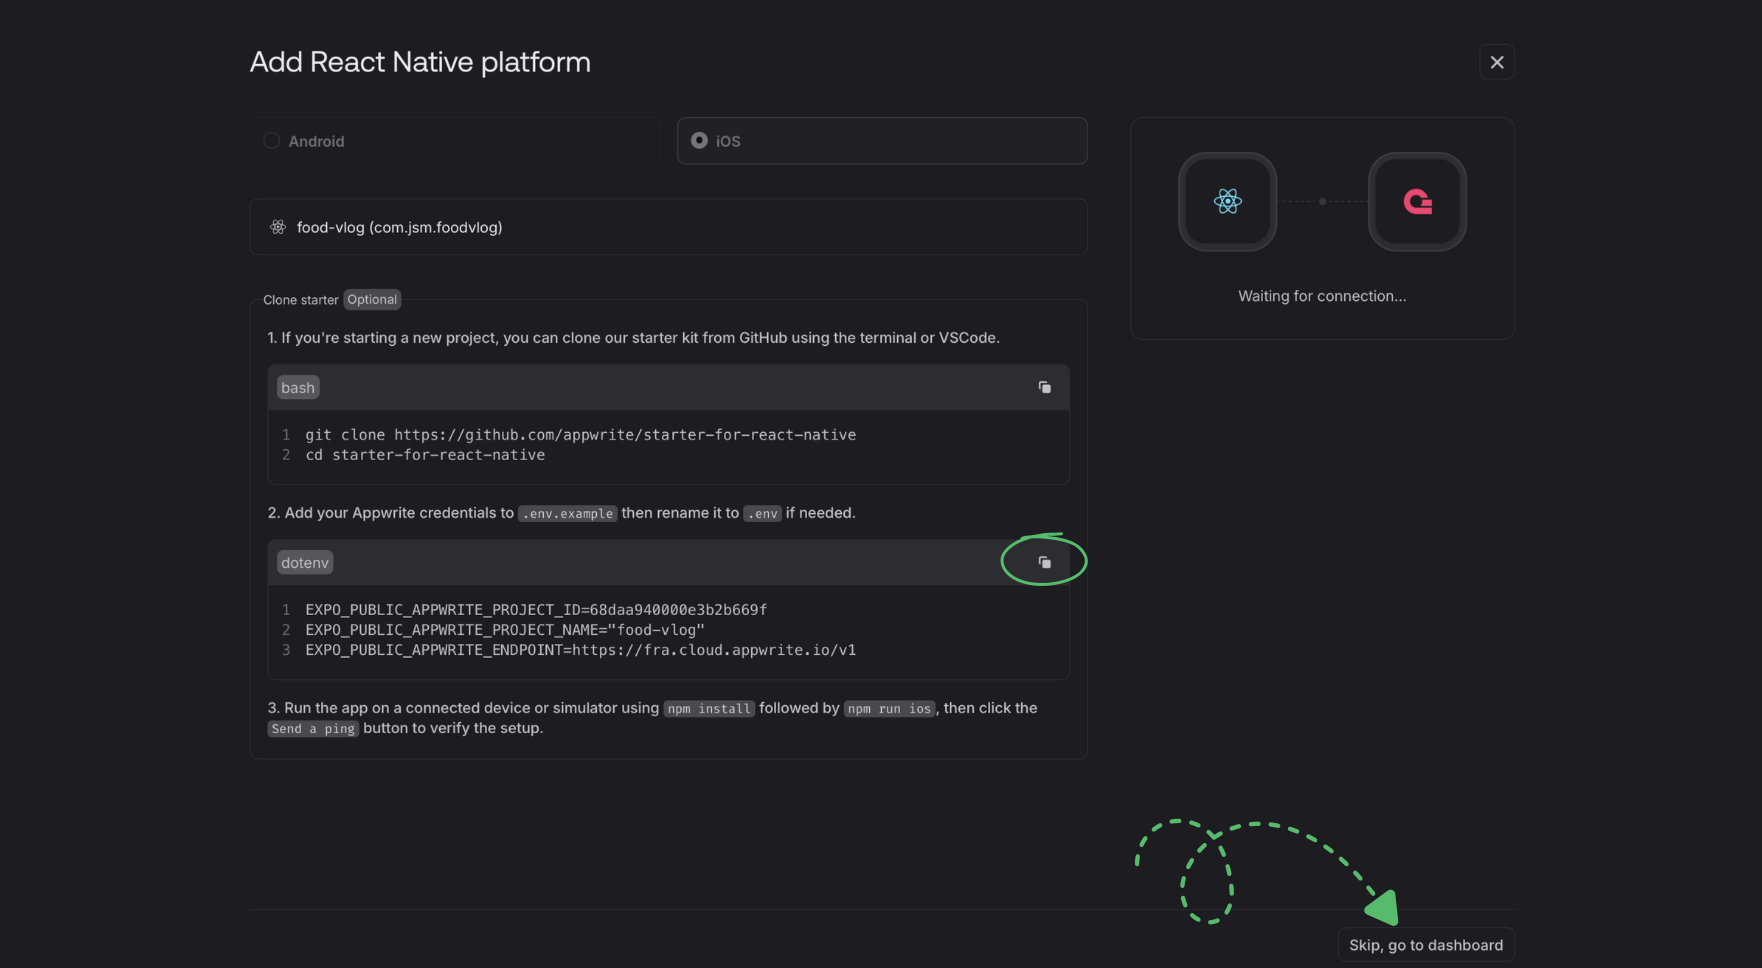
Copy the credentials and navigate to the dashboard
Using the “Database” button navigate to the database

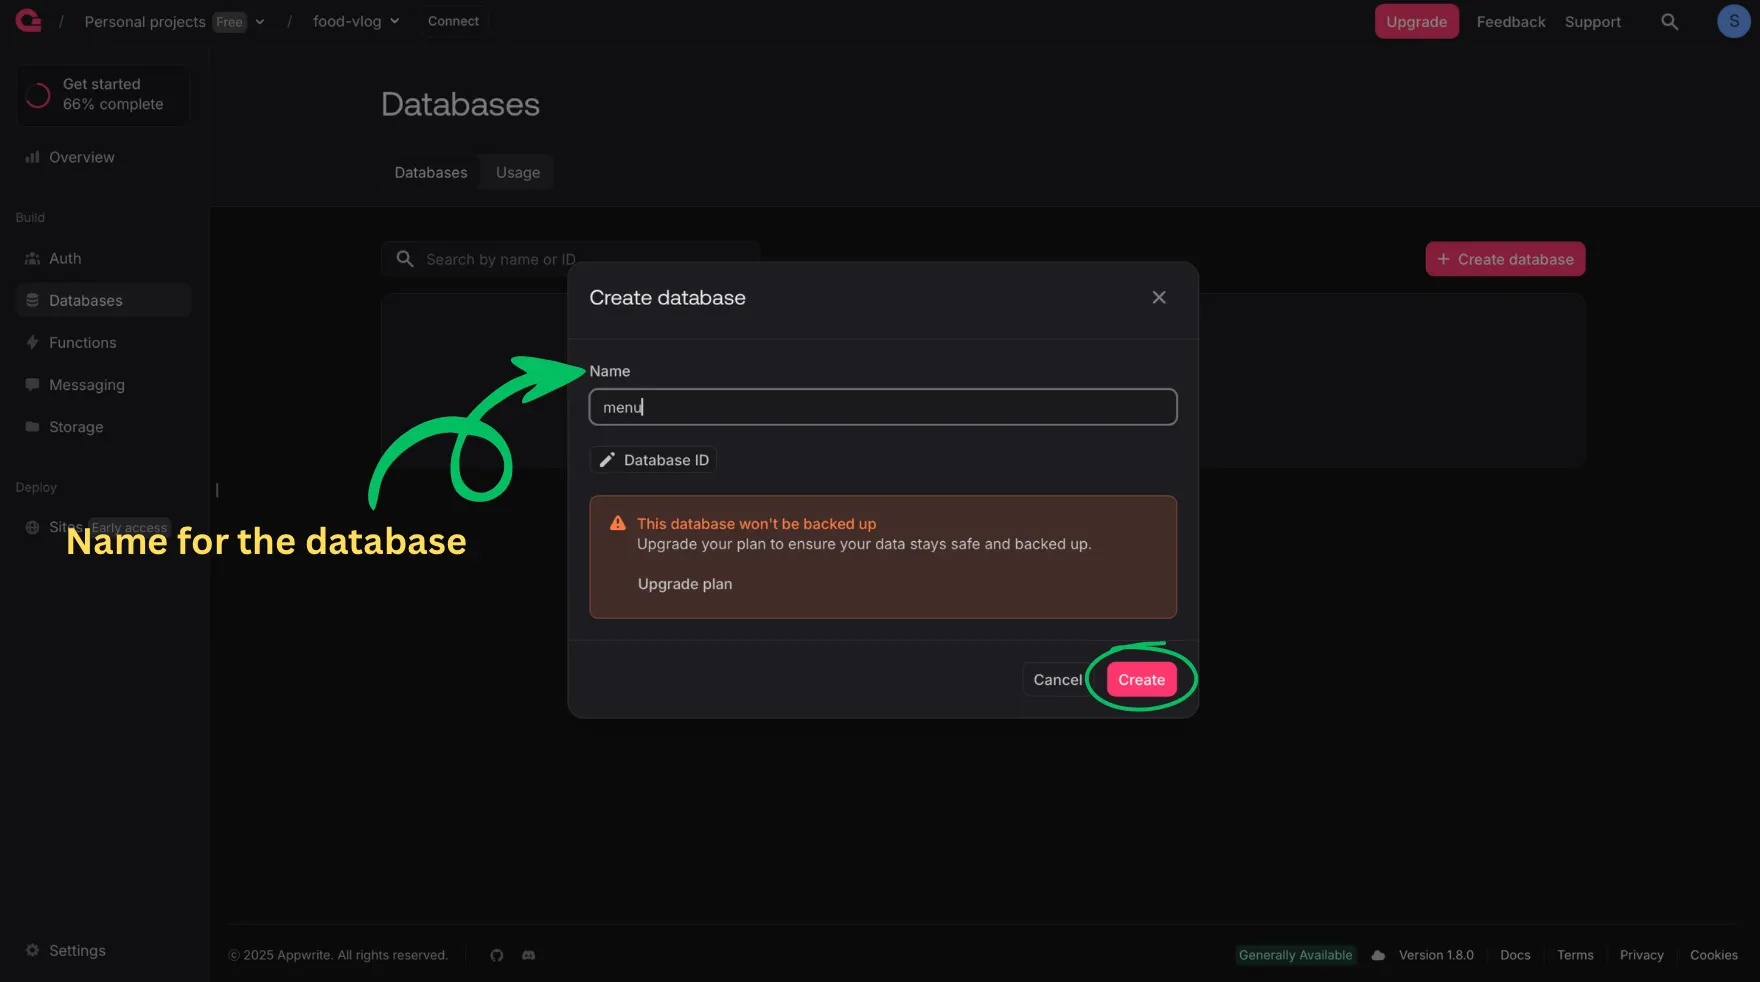
To create the database click “Create database”.

Enter the name of the database and create database using the “Create” button.
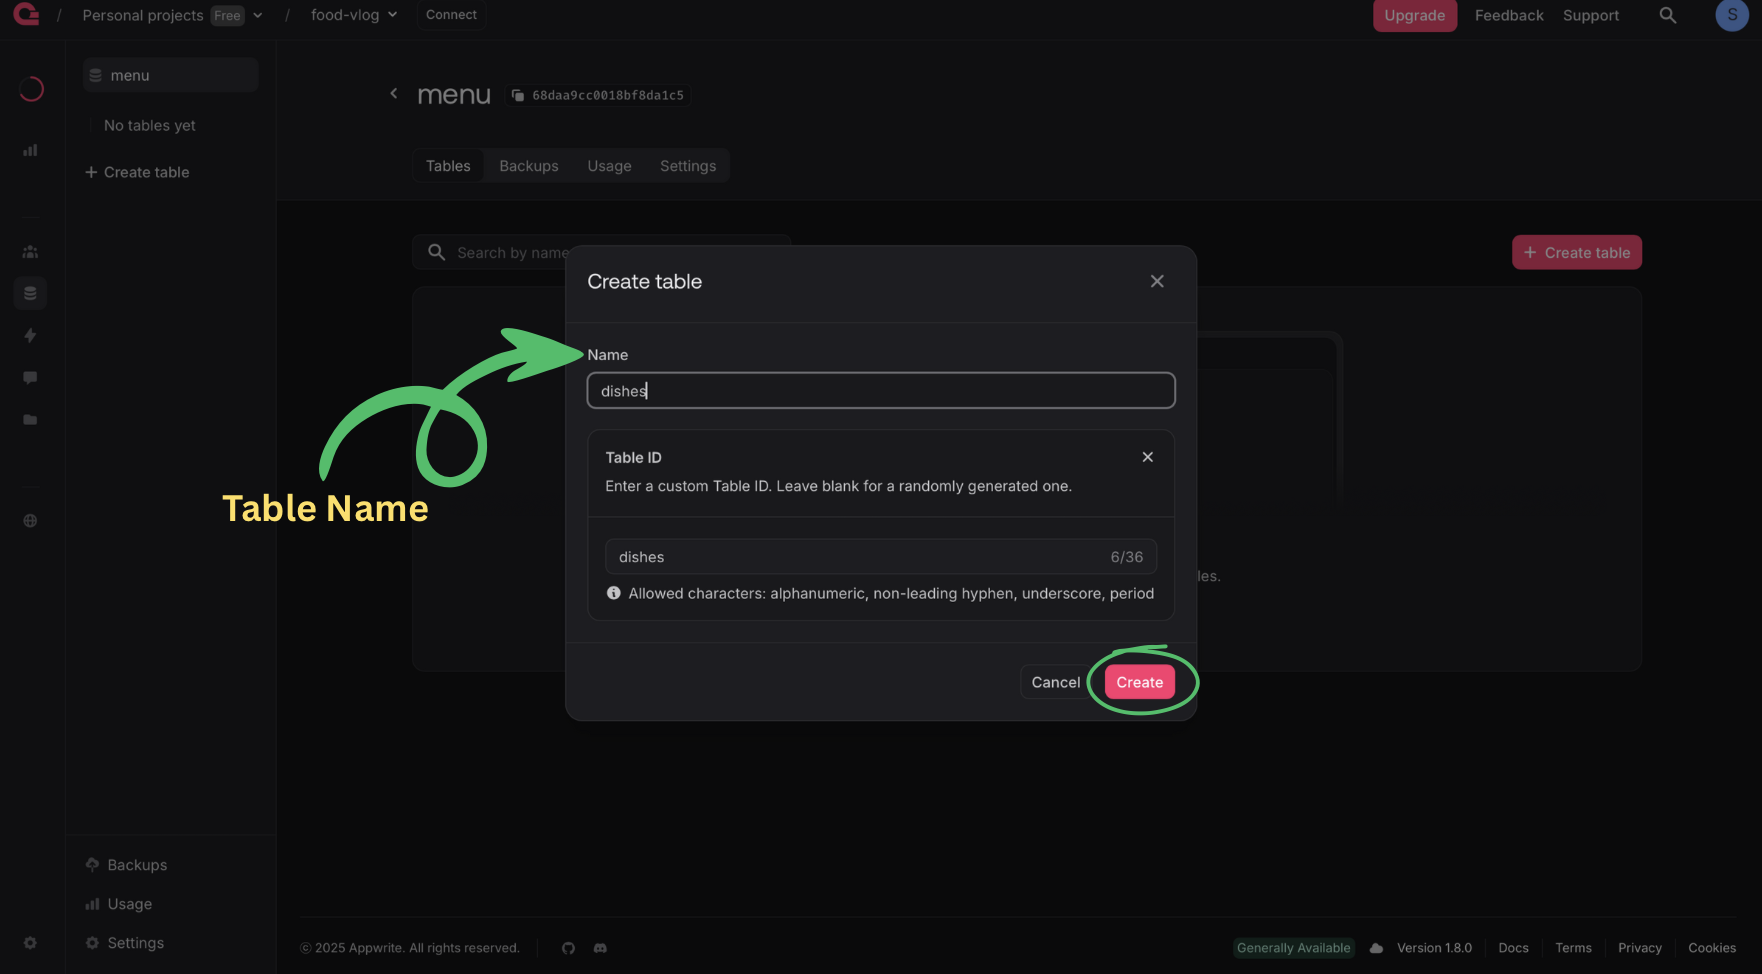
Copy the databse Id. To create the table click “Create Table”.

Enter the name of the table and using the “Create” button create the table.
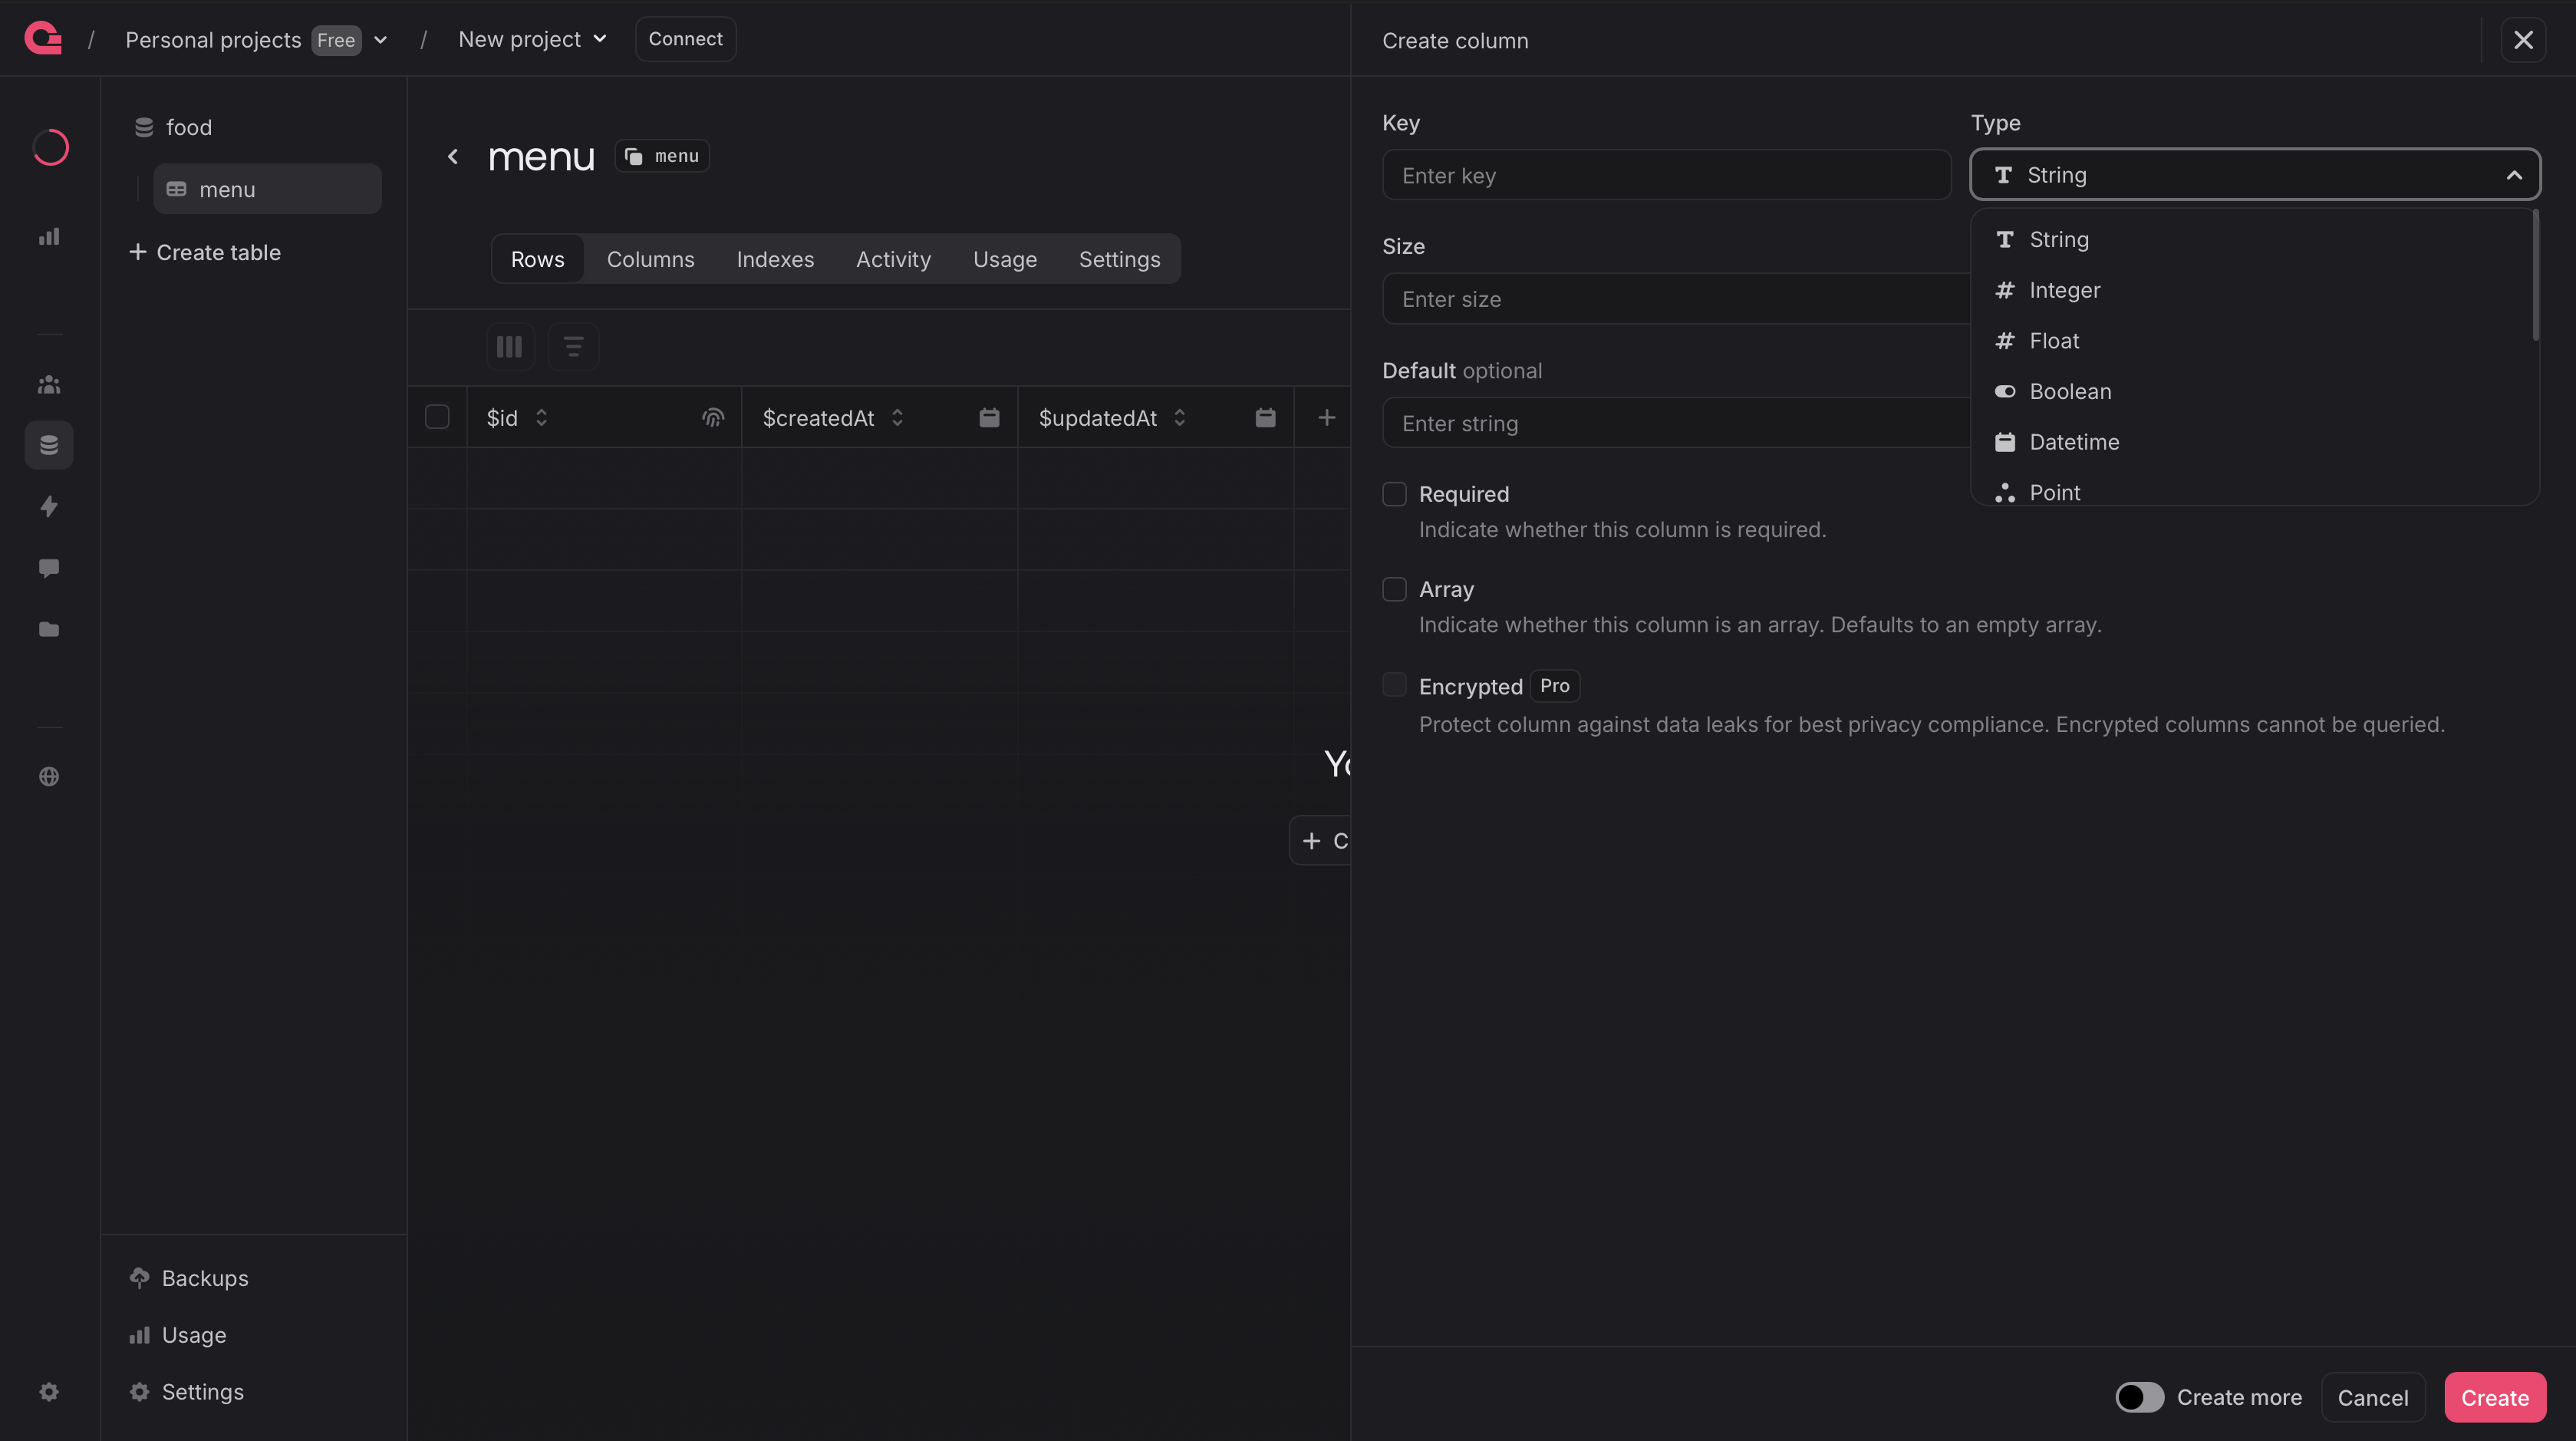
The appwrite updated the database format (NON-SQL to SQL) so they replaced the names of document and attribute to row and column respectively. To create the column click “Create Column”.
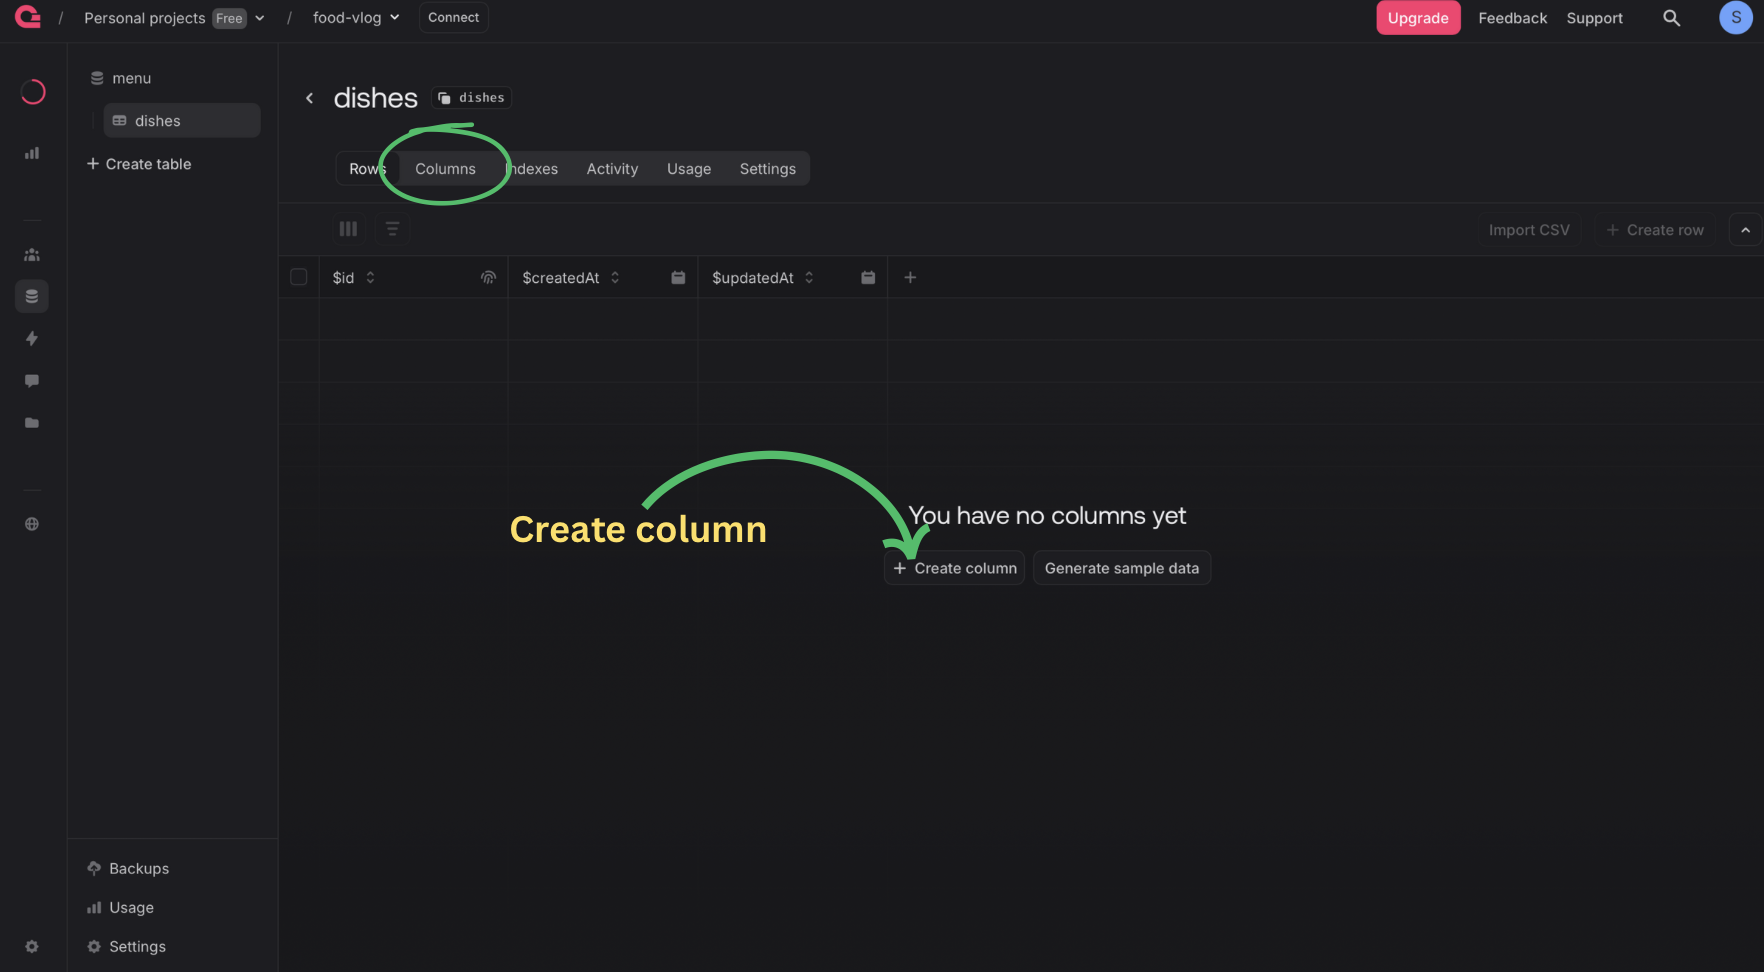
Enter the key. Choose the type of key. If necessary you can add size, default value and make it required. At last click “Create”.