Testing Next.js Apps with Jest
Loading...
Loading...

Join JS Mastery Pro to apply what you learned today through real-world builds, weekly challenges, and a community of developers working toward the same goal.
Testing is one of those things that developers often skip… until a bug slips into production. Then we realize just how important it is.
In the world of React and Next.js, Jest has become the go-to testing framework. It’s fast, powerful, and pairs perfectly with Testing Library to simulate real user interactions.
In this post, we’ll walk through how to set up Jest in a Next.js app, write different types of tests (unit, component, API), handle mocks, and follow some best practices.
For small projects, developers often skip writing tests. But as an application grows, testing becomes essential. Tests help ensure that all functionality, components, and business logic work as expected.
Why is this so important? Because even a small change in one part of your app can unintentionally break something else that depends on it. Without tests, these issues might go unnoticed until they reach production.
Testing is also a key part of modern CI/CD pipelines. Automated tests allow us to verify that the application is stable before every deployment, saving developers from manually re-checking features after each change. In large systems, this saves enormous amounts of time and prevents human error.
At first, writing tests might feel like extra work or even a waste of time. But as your application scales, you’ll quickly realize that tests save far more time than they take. They give you confidence to refactor code, add features, and deploy without fear of breaking existing functionality.
Finally, testing isn’t just about code quality; it’s also a valuable career skill. Many companies expect developers to have testing knowledge, and being able to write solid tests will give you a strong edge in the job market.
If you're ready to dive deeper into mastering Next.js testing and other essential skills that can transform your development career, sign up for early access to JS Mastery Pro | Code Your Way to a Life-Changing Career. Be among the first to unlock comprehensive courses, real-world projects, and guidance that can level up your development career.
When it comes to setting up Jest in a Next.js app, you have two main options:
Start with a ready-to-go example (Jest preconfigured):
npx create-next-app@latest --example with-jest with-jest-appAdd Jest to an existing Next.js project (most common).
Since you’ll often need to configure Jest in an existing project, let’s walk through the setup step by step.
First, install Jest along with Testing Library and TypeScript support (even if you don’t use TS heavily, it’s good practice for config files):
npm install -D jest jest-environment-jsdom @testing-library/react @testing-library/dom @testing-library/jest-dom ts-node @types/jest
# or
yarn add -D jest jest-environment-jsdom @testing-library/react @testing-library/dom @testing-library/jest-dom ts-node @types/jest
# or
pnpm install -D jest jest-environment-jsdom @testing-library/react @testing-library/dom @testing-library/jest-dom ts-node @types/jestNext, generate a basic Jest configuration by running:
npm init jest@latest
# or
yarn create jest@latest
# or
pnpm create jest@latest
You’ll be prompted with a few setup questions. Here are the recommended answers:
This generates a starting jest.config.ts file.
Now, replace the generated config with one optimized for Next.js:
// jest.config.ts
import type { Config } from 'jest';
import nextJest from 'next/jest.js';

const createJestConfig = nextJest({
  dir: './',
});

const config: Config = {
  coverageProvider: 'v8',
  testEnvironment: 'jsdom',
  clearMocks: true,
  setupFilesAfterEnv: ['<rootDir>/jest.setup.ts'],
  testMatch: ['**/__tests__/**/*.+(js|jsx|ts|tsx)'],
  collectCoverage: true,
  coverageDirectory: 'test-reports/',
  coverageReporters: ['html'],
  collectCoverageFrom: ['**/components/**/*.{js,jsx,ts,tsx}', '**/app/**/*.{js,jsx,ts,tsx}'],
  moduleNameMapper: {
    '^@/components/(.*)$': '<rootDir>/components/$1',
    '^@/(.*)$': '<rootDir>/$1',
  },
};

export default createJestConfig(config);
A few important notes:
//
testMatch: ['**/__tests__/**/*.+(js|jsx|ts|tsx)'];Finally, create a jest.setup.ts file at the root of your project and include Testing Library’s custom matchers:
// jest.setup.ts
import '@testing-library/jest-dom';
We already referenced this file in setupFilesAfterEnv, so Jest will automatically run it before each test.
And that’s it! You now have a complete Jest testing environment in your Next.js project.
With Jest and the setup we just configured, you can test pretty much everything in your Next.js app, from component rendering and user interactions, all the way to API routes and server actions (using mocks).
But before we dive into the advanced stuff, let’s start with something super simple: testing a page that renders “Hello, world!”.
Let’s make a page with a heading:
// app/page.tsx (or pages/index.tsx if you're using the pages router)

export default function Home() {
  return (
    <div>
      <h1>Hello, world!</h1>
    </div>
  );
}Next, we need a test file. By convention, Jest looks for files ending in .test.tsx or .spec.tsx.
You can organize test files in two common ways:
NavBar.tsx;
NavBar.test.tsx;__tests__/
home.test.tsxBoth are valid approaches; it really comes down to preference and team standards. In this example, we’ll go with the __tests__ folder for clarity.
Here’s our test:
// __tests__/home.test.tsx
import { render, screen } from '@testing-library/react';
import Page from '../app/page';

describe('Home Page', () => {
  it('renders the home page heading', () => {
    render(<Page />);

    // Find the heading element
    const heading = screen.getByRole('heading', { level: 1 });

    // Assertions
    expect(heading).toBeInTheDocument();
    expect(heading).toHaveTextContent('Hello, world!');
  });
});Now run:
npm testYou should see a green check ✅, your first test passed!
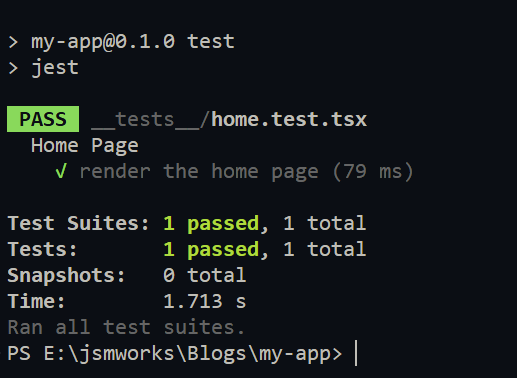
What happened here?
That’s it, your first successful test 🎉
But here’s the thing, sometimes you tweak a component, run your tests, everything passes… and then you push to production. Only to realize your tiny change actually broke the UI. The logic is fine, so your test didn’t catch it, but the visual output? Totally off.
That’s exactly when snapshot testing becomes your safety net.
Snapshot testing is a quick way to make sure your UI doesn’t change unexpectedly.
Here’s the idea:
Now let’s try it out with an example.
We’ll start with a very simple component:
// Components/Greeting.tsx

export default function Greeting({ name }: { name: string }) {
  return <h1>Hello, {name}!</h1>;
}
This just takes a name prop and says hello.
Next, let’s create a test file called __tests__/greeting.test.tsx:
import Greeting from '@/components/Greeting';

describe('Greeting Component', () => {
  it('renders the correct greeting text', () => {
    render(<Greeting name="Alice" />);
    expect(screen.getByText('Hello, Alice!')).toBeInTheDocument();
  });

  it('matches the snapshot', () => {
    const { asFragment } = render(<Greeting name="Alice" />);
    expect(asFragment()).toMatchSnapshot();
  });
});
Here’s what’s happening in our tests:
⚠️ Important note: Snapshot testing is great for making sure your UI doesn’t change unexpectedly, but don’t rely on it for everything. For critical functionality (like verifying text labels, button clicks, or API calls), it’s better to write explicit tests. Snapshots are best used as a safety net, not your only test strategy.
And speaking of what snapshots can’t catch… what about components that fetch data from an API? Let’s see how mocking API calls helps us handle that.
For components fetching data, mock API calls. Suppose a UserList component fetches users:
When a component fetches data from an API, we don’t want our tests to rely on real external services. Why?
Let’s build a simple UserList component that fetches users from DummyJSON API:
'use client';

import { useEffect, useState } from 'react';

interface User {
  id: number;
  firstName: string;
  lastName: string;
}

export default function UserList() {
  const [users, setUsers] = useState<User[]>([]);
  useEffect(() => {
    fetch('https://dummyjson.com/users')
      .then((res) => res.json())
      .then((data) => {
        setUsers(data.users);
      });
  }, []);

  return (
    <ul>
      {users.map((user) => (
        <li key={user.id}>
          {user.firstName} {user.lastName}
        </li>
      ))}
    </ul>
  );
}
Here’s how we can test UserList by mocking the fetch call:
// __tests__/UserList.test.tsx
import { render, screen, waitFor } from '@testing-library/react';
import UserList from '@/components/UserList';

// Mock data
const mockUsers = [
  { id: 1, firstName: 'Alice', lastName: 'Smith' },
  { id: 2, firstName: 'Bob', lastName: 'Johnson' },
];

// Mock the global fetch function
global.fetch = jest.fn(() =>
  Promise.resolve({
    json: () => Promise.resolve({ users: mockUsers }),
  }),
) as jest.Mock;

describe('UserList component', () => {
  it('renders a list of users from API', async () => {
    render(<UserList />);

    // waitFor is needed because the fetch happens asynchronously
    await waitFor(() => {
      expect(screen.getByText('Alice Smith')).toBeInTheDocument();
      expect(screen.getByText('Bob Johnson')).toBeInTheDocument();
    });
  });
});
Here’s what’s happening in our tests:
With this approach, we can also simulate error cases by mocking fetch to reject or return an empty list.
Writing tests is one thing, writing good, maintainable tests is where the real skill comes in. Here’s how to keep your Next.js tests solid:
Two common approaches:
components/Greeting.tsx
components/Greeting.test.tsx__tests__/
components/
Greeting.test.tsx
pages/
page.test.tsxPick the one that fits your workflow.
Check test coverage:
npm test -- --coveragetest-reports/index.htmlIt shows covered files, statements, functions, branches, and gaps.
Here’s an example of what looks like the HTML:
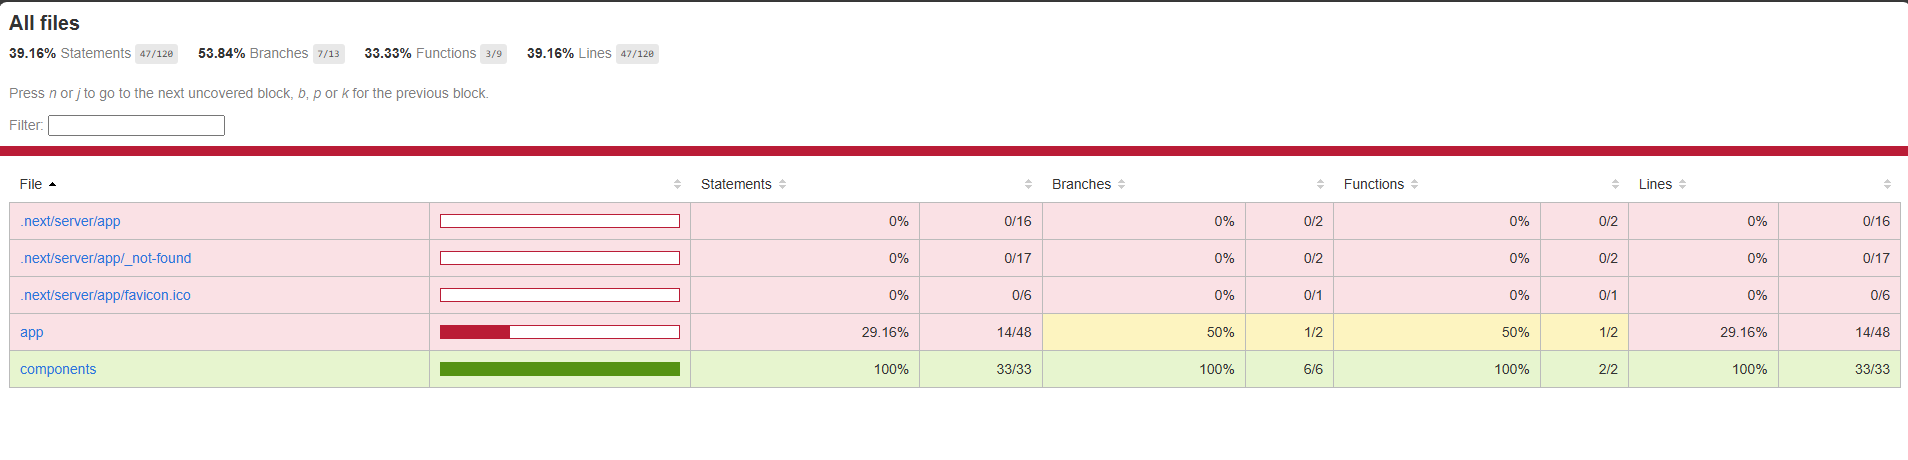
This visual report is super handy for spotting areas that might need more testing.
Run tests automatically on every push or PR (GitHub Actions, etc.) to catch issues early and keep your main branch safe.
Use @testing-library/jest-dom matchers for accessibility checks:
expect(screen.getByRole('button')).toHaveAccessibleName('Submit');Following these keeps your tests reliable, maintainable, and helpful while saving headaches as your app grows.
In short, testing Next.js apps with Jest ensures your application is robust and maintainable. By setting up Jest properly, writing tests for components and Next.js-specific features, and following best practices, you can catch bugs early and ship with confidence. Start small, test critical components, and gradually expand your test suite.
If you want to take your Next.js testing skills even further, check out these resources: